IMPORTANT NOTICE
We are very sorry that there haven't been any updates available for quite some time now. The latest version supported is 3D Studio Max 2020 and there will be no future updates.
Our external developer has stopped developing our plugins and we don't have access to the source code. We are working on in-house solutions but we can't give any release dates at the moment.
The situation is very annoying for our customers as well as for us and we are very sorry about that!
If you still decide to purchase our plugin, you can do so and support the development of future software.
Thank you.
description
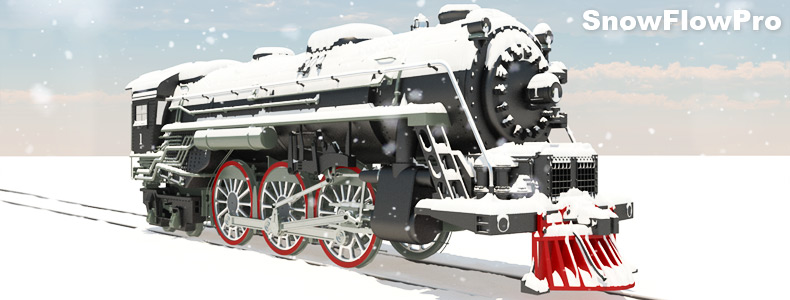
SnowFlowPro is a 3D Studio Max plugin that creates realistic snow with ease! You just pick your desired objects and SnowFlowPro does the snow for you! Let the snow fall on your 3D objects and scenes with the click of a button. A variety of parameters ensures that you get the desired results in every situation.
SnowFlowPro demo
 Download our demo for free and try SnowFlowPro before you buy it. The demo version is limited to viewport preview only (no rendering and no convertion to mesh possible) and has a maximum grid size of 100.
You can download SnowFlowPro demo here.
Download our demo for free and try SnowFlowPro before you buy it. The demo version is limited to viewport preview only (no rendering and no convertion to mesh possible) and has a maximum grid size of 100.
You can download SnowFlowPro demo here.
features
- self-explaining user interface for ease of use.
- completely new snow method supporting snow effects for overlapping objects.
- advanced calculation method for very fast computations.
- advanced settings to get the best out of SnowFlowPro.
- full control over the calculated mesh. You can even convert to editable mesh or poly.
- unlimited network rendering licences. Just use the unactivated version on your renderfarm.
- SnowFlowMaterial - a snow material for Scanline and VRay.
- SnowFlow 1.9 - the original MaxScript version - included!
See the different settings in action ▸
version overview
| SnowFlow | SnowFlowPro | SnowFlowPro demo | |
|---|---|---|---|
| quality | |||
| speed | |||
| comic look possible | |||
| professionality | |||
| mesh output | |||
| cover multiple objects at once | |||
| mesh conversion | |||
| add modifiers | |||
| render output | |||
| render nodes | |||
| plugin type | MaxScript | C++ | C++ |
requirements
- Autodesk 3D Studio Max (Design) 2008 - 2020. NO FURTHER UPDATES AVAILABLE!
- You do NOT need VRay, but we have Scanline and VRay materials included.
changelog
-
[v1.1.0]
- updated installer to support 3D Studio Max 2020
-
[v1.1.0]
- updated installer to support 3D Studio Max 2019
-
[v1.1.0]
- updated installer to support 3D Studio Max 2018
-
[v1.1.0]
- new installer
- support for 3D Studio Max 2017
- support for 3D Studio Max 2016
- minor bugfixes
-
[v1.0.2]
- new installer
- support for 3D Studio Max 2015
- support for 3D Studio Max 2014
-
[v1.0.1]
- support for 3D Studio Max 2013
-
[v1.0]
- first SnowFlowPro version
installation
Just run the installer of SnowFlowPro. You will find the SnowFlowPro object in the "Create panel". There you select "Geometry" and choose "SnowFlowPro" from the dropdown list. The SnowFlowMtl and VRaySnowFlowMtl are listed in the material editor.
If you installed the demo version you should first uninstall it by deleting the file "SnowFlow.dlo" from "[3DStudioMax]\plugins" to avoid problems.
SnowFlow 1.9 gets also installed. You can run SnowFlow 1.9 as a macroscript from your toolbar or directly through SnowFlow.mse from "[3DStudioMax]\scripts\48design\SnowFlow".
licences
After purchasing the plugin, you will have to activate it on the machine you want to use it on. For network rendering you just need to install SnowFlowPro on each render client. You do not need to activate it on your renderfarm.
Settings
Below you find all the settings of SnowFlowPro with a short description.
For the OLD SnowFlow 1.9 (included for nostalgic reasons) take a look inside the SnowFlow Quick Guide which includes detailed explanations as well as Tips & Tricks for workflow optimisation.
 Snow Covered Objects
This is where you pick the objects that should be covered with snow. The first button enables you to pick a single object. When selected you can press <h> key on your keyboard to open a list for selecting multiple objects. The second button deletes a selection from the list of snow covered objects.
 Let it snow
By clicking on that button you start the snow process. All objects listed in the "Snow Covered Objects" box will have a snow coat after the computation.
 grid width, grid height (Basic Parameters)
You define your snow mesh dimensions via width and height. Dependent on your scene the resulting mesh will have about widht*height*2 triangles. Higher values result in a more accurate snow mesh covering the objects but also the amout of triangles rises dramatically. So be careful with your choice to find a good trade-off between accuracy and amout of triangles. You can also add an optimize modifier afterwards to shrink polygon count.
 quad grid (Basic Parameters)
If you select quad grid the mesh's surface rectangles will be quadratic when viewed from the top of the scene, as shown in the example on the left. This ensures an equal sampling distance in x- and y-direction of your scene.
 surface roughness (Basic Parameters)
This parameter lets you control the surface slickness of all snow covered objects at once. With a value near 0.0 only faces parallel to the ground will be coated with snow (this is a very slick surface). With higher values snow will also stay on inclined faces. Thus the faces are more "rough" and even strong inclined faces can hold snow.
 gap height (Basic Parameters)
This parameter concerns the height difference of two adajacent (snow) areas at their common edge. On one hand these two areas are considered to be two seperate areas with a smooth snow bridge at their edge in common, if their height difference is greater than the gap height parameter's value. On the other hand these areas are seen as one single area with probably a sharper snow bridge, if their height difference is less than the choosen gap height.
 thickness (Basic Parameters)
This parameter controls the height of fallen snow. Please note that if noise is added, the final snow height can be a bit higher than the value set here. It’s also possible to add more thickness to the final snow mesh with a push modifier.
 consistency (Basic Parameters)
The consistency influences the snow curve on an edge. Wet snow (value > 0.7) builds a rather sharp curvature whereas powdery snow (value < 0.3) has a significant soft curvature.
 noise (Basic Parameters)
Noise controls the amount of turbolences of the snow surface. This makes the snow surface look more natural. You can also add a noise modifier on top of the final snow mesh to get a similar effect or use bump/displacement in your material.
 shell (Basic Parameters)
With shell checked, the snow mesh will be closed at the bottom side and form a closed solid mesh. This is useful for SSS effects for example. Attention: this doubles the triangles of the snow mesh!
 blend outer edges (Advanced Parameters)
Snow edges on an elevated snow area (termed as outer edges) show slight artifacts when covered with less snow as shown in the example on the left. If these artifacts occur then they can be moderated with this parameter.
 blend inner edges (Advanced Parameters)
Snow edges on a lowered snow area (termed as inner edges) show slight artifacts when covered with less snow as shown in the example on the left. If these artifacts occur then they can be moderated with this parameter.
 explode objects to elements (Advanced Parameters)
SnowFlowPro temporarily seperates all object parts/elements for calculation purposes. During the computation of the snow mesh a teapot would be split in its seperate parts: the body, the handle, and its spout.
 collapse self-intersections (Advanced Parameters)
Self-intersections inside an object are collapsed. Change this parameter if you experience problems as shown in the image.
 direct visible faces only (Advanced Parameters)
This can be compared to parallel light from above. Only face that would be directly lit will be covered with snow. Overshadowed faces will be left plain.
 surface relaxing (Advanced Parameters)
Surface relaxing makes a "smoother" surface. It has effect on the snow surface even if noise is on.
Tips, Tricks & Pitfalls
The following tips, tricks and pitfalls should help you to find ways around unwanted artefacts generated by SnowFlowPro. These artefacts arise because of calculation problems where no workaround could be found but can be bypassed by parameter settings.
 needle-like artifacts
If you experience a problem like shown in the image on the left try to lower the "surface roughness" parameter.
 wrinkle artifacts
These artifacts are depicted in the image on the left. To avoid or moderate wrinkles try to increase the "consistency" and "surf. relaxing" parameter as shown in the example on the left. These wrinkles arise because of the sampling technique used to calculate the snow heights.
 hole artifacts
Avoid too steep faces as shown on the left. They will lead to ugly holes in the blanket of snow. The problem arises because these faces can not hold snow. As a result they are left out during snow triangulation. We already integrated a fix to moderate the appearance of these artifacts but they still can occur. The ring on the left has been slightly rotated about 5° so the side faces very steep and therefore can not hold snow (see red circle). For steep faces (seen along the negative z-axis) keep the following in mind: 0° to 84° and >90° is ok but 85° to 90° will cause hole artifacts.
 choose adequate grid size
Always keep in mind that a coarse grid size absorbs detailed structures and an extreme fine grid size leads to a huge amount of triangles (> 50 million). On the first image a very coarse grid is used for the snow mesh. Most of the details of the locomotive are absorbed. The result of an appropriate gird size is shown in the bottom image. Details can still be seen. Hint: you should start at a coarse grid size and refine it step by step until you have satisfying result.
If you want to shrink polygon count after calculations you can always add an optimize or ProOptimizer modifier on top of your stack. This will ensure that mostly plain parts of your snow mesh are left fairly rough triangulated but parts that need more tesselations will keep details.
 split your scene to sub-scenes if necessary
If you have a large ground with detailed objects on it, it's better to separate the ground from the objects: one SnowFlowPro for each object set. The ground only needs a few triangles for good snow results but the objects need a finer snow grid. In the example on the left a grid of 400x400 is used for both teapot and plane with one SnowFlowPro. On the right side the scene is split. For the plane a snow grid size of 50x50 is used and for the teapot a grid size of 100x100. As you see the triangle amount dramatically decreases while the teapot's snow mesh is notably more detailed.
 choose an appropriate thickness
Snowbound objects are only detectable by SnowFlowPro if these objects are fully connected or intersect themself. In the example shown box 1 and box 2 stick together whereas box 3 has a levitating part. The upper left image shows the object setup. The upper right image shows the objects with a moderate thickness. In the two images below the thickness is increased. On the left the snowbound objects look plausible whereas the snow looks weird on the right side (red circle).
Buy now for SGD 168.60* only! (workstation licence, minor version updates included!)
Get Help
- I get a MaxScript error when I start SnowFlowPro! Why?
- What is the difference between SnowFlow and SnowFlowPRO?
- Is there a special upgrade price (discount) from SnowFlow 1.8 to SnowFlowPro?
- Can I use network rendering with SnowFlowPro?
- I'm missing snow accumulation in SnowFlowPro! Why does it not work?
- View All Questions
2009 2010 2011 2012 2013 2014 2015 2016 2017 2018 3d-studio-max 3ds 3dsmax collision-map demo download inverno invierno kostenlose-updates licence license lizenz logiciel neige neiges neve nieve one-click-solution plugin schnee script scripted-plugin śnieg snow snow-surface snowflow snowflowpro software trial vray x32 x64 软件