IMPORTANT NOTICE
We are very sorry that there haven't been any updates available for quite some time now. The latest version supported is 3D Studio Max 2020 and there will be no future updates.
Our external developer has stopped developing our plugins and we don't have access to the source code. We are working on in-house solutions but we can't give any release dates at the moment.
The situation is very annoying for our customers as well as for us and we are very sorry about that!
If you still decide to purchase our plugin, you can do so and support the development of future software.
Thank you.
description
SnowPrint is a 3D Studio Max plugin that enables you to let objects print on other objects. Leave footprints in snow, sand or mud. Build wet- and collision-maps. Bring details to your winter sceneries!
features
- self-explaining user interface for ease of use
- footprints, imprints, pencil strokes, wetmaps and so on in...
- snow, sand, mud or whatever you want to use it for
- Biped, CAT, all Editable Poly and Mesh objects, Nurbs, Patches supported
- Splines and Shapes supported, when enabled in viewport
- VRay Proxies supported, but only the preview-mesh in the viewport
- SnowPrint supports nearly everything having faces in the viewport!
See the different settings in action ▸
requirements
- Autodesk 3D Studio Max (Design) 2009, 2010, 2011, 2012, 2013 (all x32/x64), 2014, 2015 and 2016 (x64 only) NO FURTHER UPDATES AVAILABLE!
changelog
-
[v2.6.1]
- support for 3D Studio Max 2014, 2015, 2016
-
[v2.6]
- support for 3D Studio Max 2013
- minor bugfixes
-
[v2.5]
- optimized collision algorithm
- extreme performance boost
- better subframe sampling
-
[v2.0]
- standalone plugin (no SnowFlow needed)
- newly programmed from the ground up
- completely new user interface
- quality and speed enhancements
-
[v1.0]
- integrated in SnowFlow 1.x
installation
Just use the SnowPrint installer. You find the SnowPrint-Texture in the material editor.
licences
After purchasing the plugin, you will have to activate it on the machine you want to use it on. If you would like to acquire multiple licenses at once, without having to purchase them separately, please contact us via email and we might even be able to offer you a special bulk discount.
SnowPrint in action
You can download the SnowPrint 2.0 tutorial scene (3D Studio Max 2010) here.
Settings
 printing objects
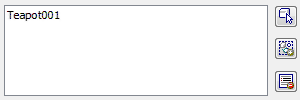
This is where you pick the objects that should print on the surface/texture. The first button enables you to pick a single object. The second button adds the current selection to the list. The third button deletes a selection from the list of printing objects. The surface to print on is automatically selected for you, it's the one you put the texture on. Just put the SnowPrint texture in a map slot of the object's material.
 printing quality
This setting controls the details of the resulting textures. You should use less quality only for previews or if you need very blurry imprints.
 basic parameters
The maximum depth controls the amount of white that is put on the texture. Take a look at your animation and find the longest distance between the surface and the printing objects below for best results. If your surface has thickness you can select "use surface height".
 texture parameters
Here you tell SnowPrint which image size your texture should have. Use "keep aspect ratio" (chain symbol) to link width and height together. The "auto tune" button on the most right makes a suggestion for a best fitting texture size regarding your surface object.
 render parameters
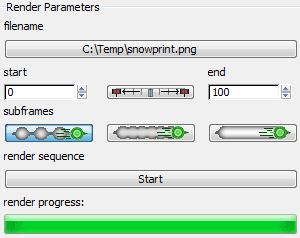
These parameters control the renderings made by SnowPrint. First you have to pick a folder, a filename and the extension (*.png, *.jpg, *.bmp, *.tif, *.tga). SnowPrint automatically adds the frame number to the filename and the name of the surface (this is necessary because you can put the same SnowPrint texture on multiple objects, although we do not recommend that). Next you have to pick the start and the end frame or select "full animation range" to render the whole timeline.
If you have fast moving objects and recognize less precise imprints on your SnowPrint texture, you can set a better subframe sampling: 1/1, 1/2, 1/4. All you need to do at the end of the configuration process is to hit START and wait for SnowPrint to finish its calculations!
Buy now for 22 € only! (workstation licence, free minor updates included!)
3d-studio-max animated-texture animation-range bump bumpmap collision-map depth depthmap displacement displacementmap download footprint footprints imprints licence license mud multithreading neige neiges neve nieve pencil-strokes pixel-perfect-collision plugin print printing printing-objects sampling sand schnee snow snowprint software stamp surface wetmap wetmaps
