Undocumented feature of VRayLensEffect
About the feature
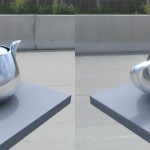 This post is about a not well (if at all) documented feature of VRay 2.3, more specifically of the VRayLensEffect render effect. Before I discovered this feature, it was very hard to tune the lens effects produced by VRay and almost all of my images were extremely blurred and shiny, which forced me to do those effects in post production.
The official VRay documentation on spot3d.com - especially the one for 3D Studio Max - does not talk about the masking possibilities of the VRayLensEffect, but in fact, this feature ultimately makes the VRayLensEffect useful!
What it does
VRayLensEffect has its own render channel: the LensEffectsSource. This unclamped channel is the base for all lens effects (Bloom and Glare) applied to your rendering. In nearly all scenes I used lens effects for, this channel was absolutely overbright, resulting in a extremely blurred image after VRayLensEffect had been applied to my renderings. Since VRay 2.3 we can overcome this fact by telling VRay to use only parts of this channel for lens effects. This is called "masking". Masking means that the lens effects are only applied to pixels with a float value above the given mask value while ignoring pixels which are not bright enough and have a lower float value.
How to use it
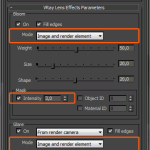 Step 1
First of all, we need to render out an image - draft quality is enough - with the options checked like shown in the screenshot to the left.
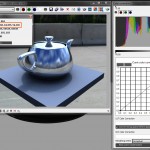 Step 2
The next step is to check the float values of the LensEffectsSource to set up mask parameters. Pick the light source in your rendering (or the light's reflection in your object) with the color/pixel picker (rightclick on your rendering while using Vray Frame Buffer) and set the mask parameter to the lowest of the float values in the "Pixel information" window (or a slightly lower value). Render again.
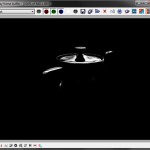
 Step 3
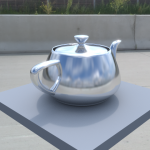
You can check the GlareMask and BloomMask channel after the rendering has finished. Tune your VRayLensEffect parameters and your render settings and render again.
Looks better now, doesn't it?
That's it!
I hope this will help some of you and save you the time to fiddle around with the settings until it looks nice. By the way: the HDRI used in this little rendering is from our product scout Andreas Reimer. Thank you Andreas!